Welcome

Thank you for visting my blog. I am fortunate to have friends that love to craft. I hope to meet new frinds as time passes. I have been an avid scrapbooker & crafter since July 1996. Thanks Char. I hope that I can inspire others to enjoy crafting as I have.


Saturday, November 16, 2013

Prima sunrise sunet cigar box mini


Kathi here to Share a new project using a cigar box, Gina's Designs, & Prima Marketing paper


 I started by selecting a cigar box, I covered the cigar box with Prima Marketing paper "Welcome to Paris". I distressed the edges of the paper I painted the edges of the paper ?box with distress paint, "black soot"


I added a binder ring to the bottom of the cigar box,

I added a handed to one side of the box. 

I decorated the front of the cigar box, I positioned the box so that it would open on the right to the left like a book. Adding a gear dollies by cutting it in half & placing it on each side on the left above the ribbon & below the ribbon on the right.  Then placed two stick pins into the center & right of the center.
I then placed the saying Once Upon a Time which I painted black.

Close up of Stick Pins
On the inside of the lid I made a pocket for tags & placed a tag inside, a dollies was placed on to the  lower outside of pocket. a garden fair was added to the side of the pocket. 
The garden fairy was painted with white gesso then added while glitter. 

First Page I added a large dollie & added a garden fairy from Gina's Designs & then placed two tags what where distressed with walnut stain with a paper clip.

I cut out two cameo frames, I staggered them making a pocket out of them. then adding  two tags
I cut out a bell jar out of the Sunrise Sunset paper  added a standing garden fairy with an intricate dollie from Gina's Designs. ON the Dollie I used Lindy Stamp Gang starbust spay.

Close up of bell jar
The photo mat was cut using a baroque die & the Sunset Sunrise paper. A dancing yellow fairy was added to the let side  of the photo mat
A sparkling pink garden fairy is bending down holding the flourish placed at the lower 
right of the  oval accent photo mat.


I cut out a stylish label & place the work "amazing" from the word & phrases II from Gina's Designs, for the fairy I used red rub in buff.. A photo could be placed under the sign.
A vintage cabinet card die was used to create a photo mat a garden fairy was placed on the lower right side of the photo mat. yellow gold bling was added to two sides of the

I created the last page using the inside of the vintage cabinet card.
Supplies used:


Prima paper
            Welcome to Paris
            Sunset Sunrise
Gina’s Designs:
            Garden Fairies
            Card Stock Dollies Intricate
            Words & Phases
Gesso
Cigar box
6 X 6 album pages
Tim Holtz:
            Distress Stain – Walnut Stain
            Binder Rings
Lindys Stamp Gang:
            Starburst – Grab a Guy Gold
                                South Shore Sand
                                Ramblin Rose Pink
Martha Stewart glitter
Metallic Rub on’s
Dies Used:
Tim Holtz
            Baroque
            Bell Jar/Pedestal
            Cameo Frame
            Styled Labels
            Vintage Cabinet Card.  
Sizzixs
            Oval Accents  


Wednesday, November 13, 2013

Christmas Rose

Kathi here today to share with you an off of the page project, for this project I choose to use OTP "Joy to the World". I am using the sign "Joy to the World as part of my center piece. The second project I added to the swan the fanciful fan.

This the swan...Christmas Rose

I covered the swan with graphic 45 paper from the collection the 12 days of Christmas. The paper is called the Christmas Rose. After covering the entire swan I cut out the center of the back of the swan to insert a flower pot for a flower arrangement. 


Side/front of the swan. 

 
I painted the the sign then sprayed it with spray adhesive then covered with fine glitter on both sides, I combined blue & green on the front & red on the back. When it was dry I added it to the center arrangement. 

  The fanciful fan was painted with distress paint & oval embellishment from the paper line was added to each of the fans. The embellishments out lined the  first 6 days of the 12 days of Christmas. 


I sprayed perfect pearls to the outside of the swan. 

A flat back pearl was added for the eyes.

Close up of the front of the swan/fan. With the organza ribbon

Finished Swan

Supplies used:
Gina's Designs:
Fanciful Fan
"Joy to the World"

Other supplies:
Graphic 45 - 12 days of Christmas Paper
Decoupage Swan
Christmas filigree
Organza Ribbon
Perfect Pearls
Thanks for stopping by at looking be sure to stop by Gina's store & check out all the new product

Monday, November 4, 2013

New Projects from Gina's Designs

I just up loaded this video to YouTube

This is one of the projects on the video.


Here is the video, enjoy

Sorry I can not get it to load please take the link and take a look. 

Thanks for watching.
Have a blessed day.

Damsel in Distress

Kathi here today to share a new layout with you. 

I started this layout by prepping the canvas with white gesso. After the canvas dried I took the brick wall and used it has a mask. I placed it on the left side of the layout. Spreading speckling with a cake spatula. I carefully removed the brick wall to allow it to dry. I then washed the brick wall in order to use it again on a second project.  Repeated the process on the right side of the layout using the chicken wire. On the right I only went up half way with the speckling then spaying the top half with lindy stamp gang spray. Then carefully removing the stencil to wash it in order to use it again
I then arranged the paper, distressing the edges, the paper was glued down using Mod Podge. I placed the 8” dollies under the photo mat.   I then cut a gear dollies in half and tucked them into the side & the bottom of the paper. 

On Laser Chipboard, the boarder stick & some of the gears, were painted with black distress paint. The wrought iron fence & the rest of gears Black UTEE was used. On the Eiffel tower gold UtEE was used then distressed with metallic rub on. 

I placed a boarder stick in the middle of the Eiffel tower a long with a metal Q at the top of the Eiffel tower. 

The flowers were prepped with white gesso and set aside to dry, then they were placed around the photo mat.

I placed the wrought iron fence on top of the chicken wire. Then I placed the Eiffel tower to the left side on top of the brick wall. 

The paper line has a butterfly in the pattern. I took an extra piece of the paper line & cut out the butterfly then placing the butterfly on top of the butterfly on the paper, making the illusion that the butterfly is flying. 

A chandelier was painted with UTEE , a mixture of gold, platinum, black & bronze. I then placed the chandelier was placed above the butterflies.


Supply List for Damsel in Distress

Gina’s Designs:
                8” Dollies
Boarder Sticks
                Brick Wall
                Brick Wall Mask
                Chandelier Shape Set
Chicken Wire Large
                Chicken Wire Mask
                Eiffel Tower
                Gears Dollies
Wrought Iron Decorative Fence

Other Products Used
16 X 20” Canvas
Distress ink – Pumas Stone & Scattered Straw
Drawer Pull
Fabric Flowers
Graphic 45 large brads
Paper Flowers
Quick Quotes paper Damsel in Distress
Speckling

Tuesday, October 15, 2013

Every Pictures Tells a Story


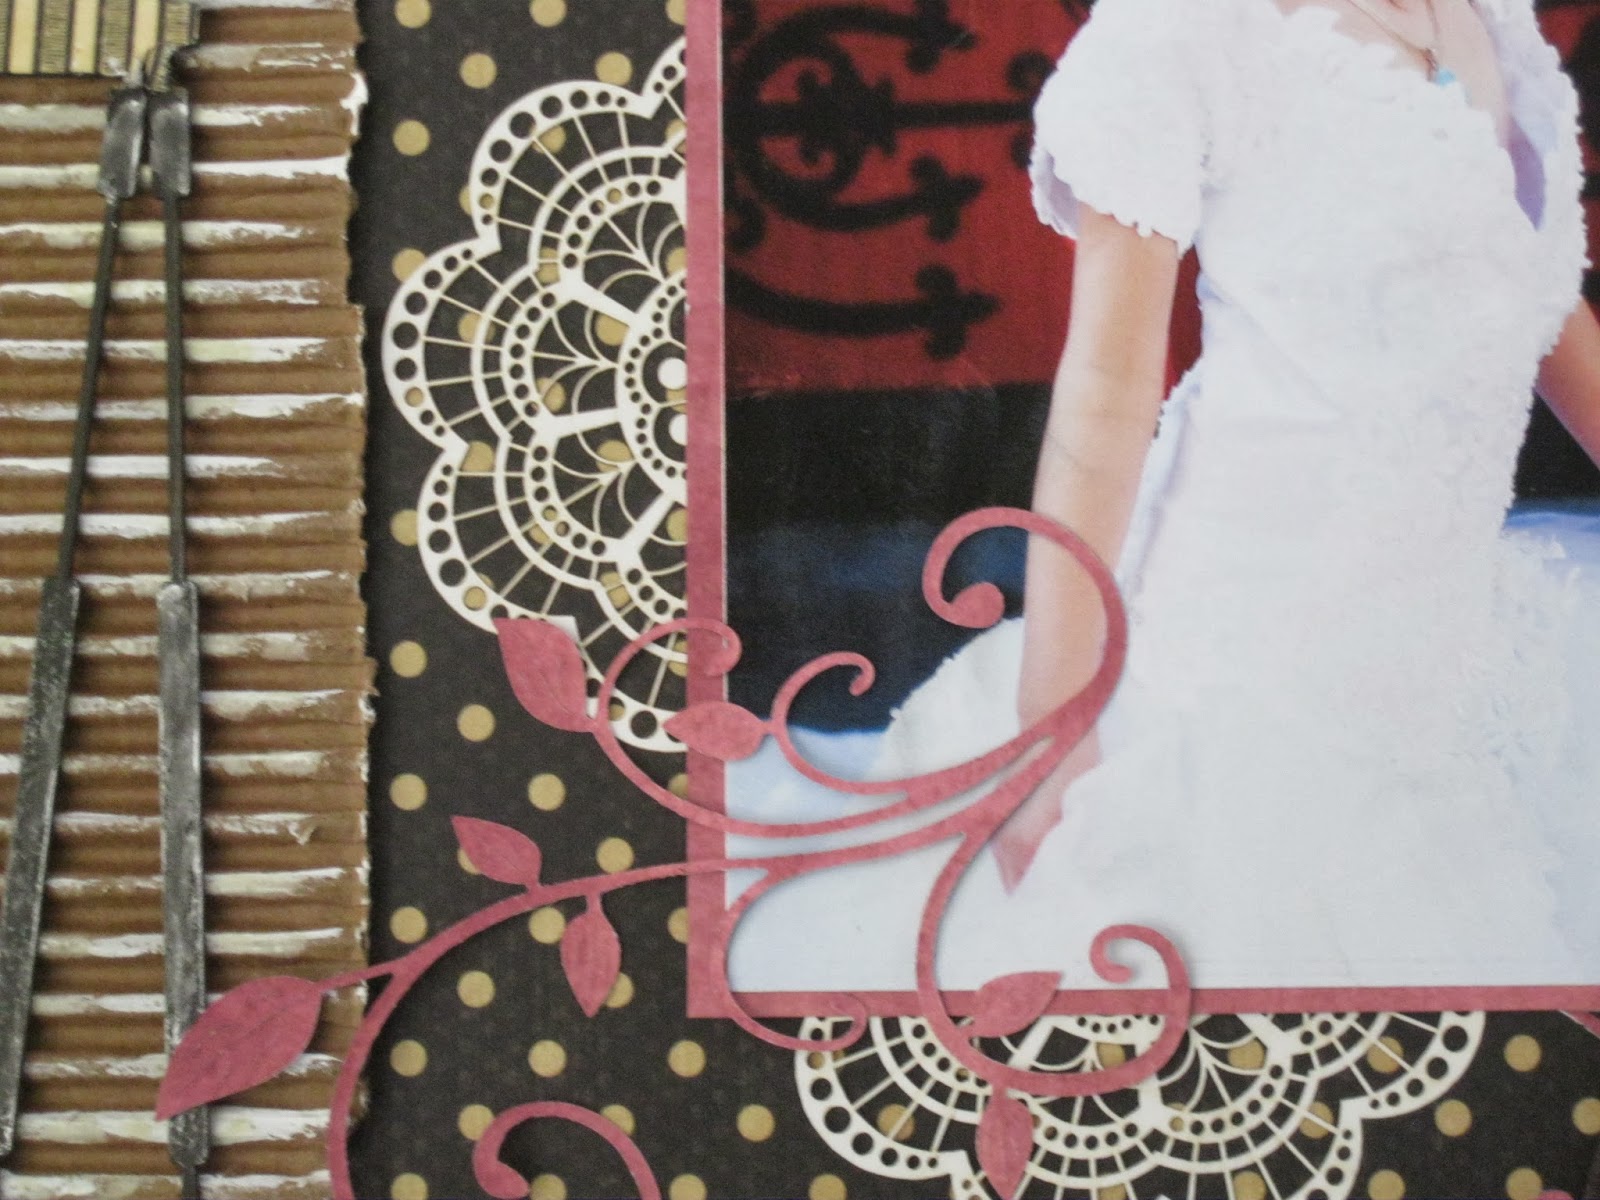
This is a 12 X 12” layout -  The base paper is by graphic 45  black with tan dots.  I created on the left side out of coordinating paper a border then I layered a corrugated strip on which I layered a laser chipboard. The corrugated strip was brushed with white gesso.  


The laser chipboard (movie camera) was layer with a piece of the paper that was fussy cut around the chipboard. Parts of the movie camera was painted a combination of black & silver to creating an older look to the camera. 


The film strip was painted black with red metallic leafing.   A rose was placed in the center of the filmstrip.   


The rose was frosted on the tips using white gesso. 


The Word & Phrase was painted with distress paint “antique linen” 


Flourishes where cut from a die using the coordinating paper.The photo was mated with the coordinating paper. Intricate Dollies where cut in half and placed under the photo’s edge in two area’s. 

Products Used:
                                  Gina’s
                                Hollywood Shape Set
                                                       Words & Phases 1
                                                Intricate Dollies  Shape Set
                                                         Other Products
                                                   Martha Stewart Punch
                                      Graphic 45 paper “Old Curiosity Shoppe”
                                       Tim Holtz Distress Coordination Paper
                                                Cherry Linn Die Flourish

Saturday, October 12, 2013

Garden Tag


For this tag I used a large tag that I cut out a large tag, from a large accu-cut tag die. The tag was edged with gesseo then layered with graphic 45 "The Ladies Diary" paper. Products then layered starting the garden gate that was prepped with distress paint. 


The garden window was prepped with gesso, distress paint  then covered with a clear distress glitter. 

 .


Behind the layered ladies and the upper garden window intricate dollies were placed. Then flowers were added beneath the right garden window next to the slender pocket. Glossy accents was added to the top of the ladies which make them appear larger.


Behind on the right side of the main tag I place a large tree that was distressed with distressed paint.  A flower spray was placed behind the pocket in front of the tree. 


Close up of slender pocket. 


Back of the tag.


Products Used:
Gina’s
Intricate Dollies Shape Set
Garden Window Shape Set
Gates Shape Set
Tree #1
Other Products
                               Distress Paint
Graphic 45 paper “Ladies Diary”
                                                                 “Secret Garden”
I Am Roses –              Roses,                                                                                                                        Bunch of Flowers                                                                           Carnations
                             Lace Ribbon
                              Accu-cute large tag